The Mentor's Guide to UHF: Setting Up Your First 4-Channel Wireless Mic System
Update on Oct. 30, 2025, 2:33 p.m.
Welcome to the club.
So, you’ve just unboxed a multi-channel wireless microphone system. It’s an exciting step up. Whether you’re managing a panel discussion, a church worship team, or a wedding band, you’ve moved beyond a simple one-mic setup and into the world of professional audio.
But let’s be honest: it can also feel a little intimidating. Suddenly, you have a rack-mountable receiver, four separate microphones, and a lot of talk about “frequencies,” “interference,” and “UHF.” It’s easy to feel overwhelmed.
My goal is to be the friendly tech expert you wish came in the box. I’m going to walk you through the entire process, from unboxing to soundcheck. We’re going to demystify this technology, and by the end, you’ll have the confidence to set up your system perfectly every time.
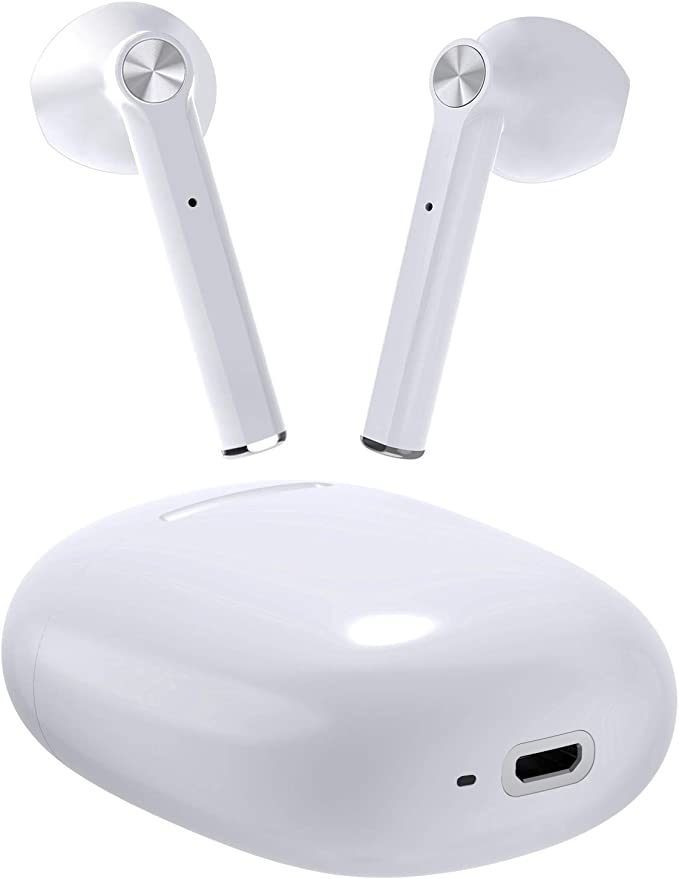
To make things tangible, we’ll use a system like the Phenyx Pro PTU-7000-4H as our classroom example. It’s a 4-channel UHF system that has all the core features we need to discuss: Auto-Scan, IR Sync, and multiple output options.
[Image of The full Phenyx Pro PTU-7000-4H system with receiver and four handheld mics]
Our lesson is in three parts:
- The “Invisible” Challenge: Conquering the airwaves (RF).
- The “Physical” Challenge: Getting the sound out of the box (Signal Chain).
- The “Acoustic” Challenge: Making it sound good in the room (Mic Technique).
Let’s dive in.
Part 1: The “Invisible” Challenge (RF & Frequencies)
First, let’s tackle the “scary” part: the invisible world of radio frequencies (RF).
What is UHF, and Why Does It Matter?
UHF stands for Ultra High Frequency. Think of the air around you as a massive, crowded party. Everyone is trying to talk at once. Your Wi-Fi router is shouting in one corner, local TV stations are broadcasting in another, and your smartphone is constantly yelling across the room.
A wireless microphone needs to have its own quiet, private conversation in this crowded room. The UHF band is just a specific “section” of this room that has been set aside for this purpose. It’s the professional standard because it’s generally less crowded than other bands (like VHF) and is excellent at punching through walls and other obstacles.
But even in the UHF section, other devices can cause “noise” or interference. This is the enemy. This is what causes those dreaded crackles, hisses, or dropouts right in the middle of a performance.
So, how do we find a quiet spot in this crowded room for our four microphones? We use our receiver’s “superpower.”
Your New Best Friend: The Auto-Scan Button
On the front of your receiver (like the one on the PTU-7000-4H), you will see an “Auto-Scan” function. This, my friend, is your new best friend.
[Image of The front panel of the PTU-7000-4H receiver, highlighting an LCD screen and controls]
Before you even turn on your microphones, you must do this first.
When you activate Auto-Scan (often by long-pressing a “SET” button), the receiver instantly sweeps through hundreds of available frequencies. It is literally “listening” for the quietest, cleanest, most interference-free spot in the room. It’s a built-in spectrum analyzer that does all the heavy lifting for you.
Once it finds a pristine-clean frequency, the receiver “claims” it for Channel 1. You will then repeat this process for Channel 2, Channel 3, and Channel 4. Each one will find its own unique, clean spot.
The “Secret Handshake”: IR Sync
Okay, so your receiver (the “base station”) has found four quiet spots. Now, how do you tell your four handheld microphones (the “transmitters”) which quiet spot to use?
You could try to dial it in manually, but that’s slow and prone to error. Instead, we use a “secret handshake” called Infrared (IR) Sync.
- On your receiver, you’ll initiate the “Sync” function (usually by tapping the “SET” button).
- You’ll see a small, dark red plastic window on the receiver’s front panel. This is the IR window.
- Pick up your first microphone. You’ll find a matching IR window on it (often in the battery compartment or on the bottom).
- Simply point the microphone’s IR window at the receiver’s IR window.
In a split second, the receiver will send a burst of infrared light containing the frequency information. The microphone “reads” this light and instantly tunes itself to the correct, clean frequency.
That’s it. Repeat this for all four mics. Your “invisible” setup is now complete and secure.
Part 2: The “Physical” Challenge (Plugging It In)
This is, without a doubt, the #1 point of confusion for new users. It’s the source of that golden question: “What amp do I use?”
Let’s look at the back of your receiver. You will see two very different types of output jacks. How you plug it in will completely change your sound and control.
[Image of The back panel of the PTU-7000-4H receiver, showing the four XLR outputs and the single 1/4-inch ‘Mix Out’]
Choice A: The “Easy” Way (The 1/4” “Mix Out”)
You will see a single jack labeled “MIX OUT” or “1/4” Output.”
- What it is: This jack takes the audio from all four of your microphones, smashes them together into one signal (a “mono mix”), and sends it out over a single, standard 1/4” guitar cable.
- When to use it: This is for the simplest possible setup. Think:
- Karaoke machines
- A single powered speaker for announcements
- A basic DJ controller with only one mic input
- The Big Problem: You have zero control. If Mic 1 is too loud and Mic 2 is too quiet, your only solution is to physically move the microphones or adjust the volume knobs on the receiver itself. It’s messy and unprofessional.
Choice B: The “Pro” Way (The 4 XLR “Balanced” Outputs)
You will also see a row of four XLR outputs. These are the 3-pin circular jacks.
- What it is: Each of these jacks sends out one isolated microphone signal. Mic 1 goes only to XLR Output 1. Mic 2 goes only to XLR Output 2. And so on.
- When to use it: This is the correct way to use this system in 99% of professional scenarios (church, band, DJ, panel).
- How it works: You will run four separate XLR cables from these four outputs into four separate channels on an Audio Mixer (like a small Behringer, Yamaha, or Mackie mixer).
This answers the “what amp” question. You don’t plug it into an “amp”; you plug it into a MIXER.
Why is this so much better? Control.
Now, your sound-person (or you) can look at the mixer and see four distinct channels: “Pastor,” “Singer 1,” “Singer 2,” and “Acoustic Guitar.” You can adjust the Volume, EQ (bass/treble), and Effects (reverb) for each person individually.
This is the secret. The “pro” setup isn’t about one cable; it’s about having individual control over every sound source.
Part 3: The “Acoustic” Challenge (Making It Sound Good)
Your system is connected. The frequencies are clean. The mixer is ready. Now, how do you avoid that awful, ear-piercing squeal known as feedback?
It comes down to understanding your microphone.
[Image of A close-up of the Phenyx Pro PWH-7 handheld microphone]
The microphones that come with a system like the PTU-7000-4H are dynamic and have a cardioid polar pattern. Let’s break that down.
- Dynamic: It’s durable and can handle loud sounds, perfect for live vocals.
- Cardioid: This is the important part. “Cardioid” just means “heart-shaped.” The microphone is designed to “hear” in a heart-shaped pattern.
It is extremely sensitive to sound coming from the front (your mouth) but actively rejects sound coming from the sides and, most importantly, the rear.
The Two Golden Rules of Microphone Use:
- Point it at the source. The mic should always be pointed at the singer’s mouth. When they turn their head, the mic should follow.
- Never, ever point a microphone at a speaker. If you point the mic at a speaker (especially a stage monitor), the mic “hears” itself, sends that signal to the mixer, which sends it back to the speaker, which the mic “hears” again… creating an infinite loop that becomes that horrible squeal.
The cardioid pattern is your defense against this, but good technique is your best weapon. Always keep the speakers in front of the microphones, not behind them.
Many handheld mics also include a Mute function. This is a lifesaver. Train your speakers and singers to use the mute button when they are not actively talking or singing (e.g., during a sermon prayer or between songs). This cuts off the mic, preventing it from picking up unwanted stage noise or coughs.
Your First Soundcheck: A Mentor’s Checklist
You’ve done it. You’ve tamed the invisible, physical, and acoustic challenges. It’s not magic; it’s just a process. Here is your checklist for every single event.
- Place your receiver where you can see it, ideally at least 3-4 feet off the ground.
- Fully extend the receiver’s antennas.
- With all microphones OFF, run the Auto-Scan function for all four channels.
- Turn on each microphone one by one and use IR Sync to pair it with its assigned channel.
- Connect your outputs. (Use the XLR outputs to a mixer if you have one. It’s worth it.)
- Set the volume knobs on the receiver to a “unity” or 12 o’clock position to start.
- Test each microphone one by one. Say “Check, check, one, two.”
- Walk the room. Listen for any dead spots or interference (you shouldn’t have any if you scanned).
- Brief your talent on proper mic technique (point it at the mouth, and use the mute button).
You’re no longer just a user; you’re a technician. You’ve got this.